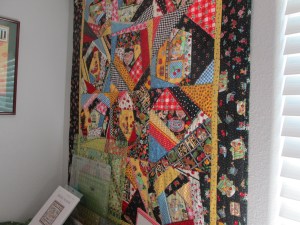
I double dare you to not be tempted by this daring quilt! We will be making a few Japanese blocks along with embroidery and applique. This is the perfect time to get your yummy Asian fabrics together!
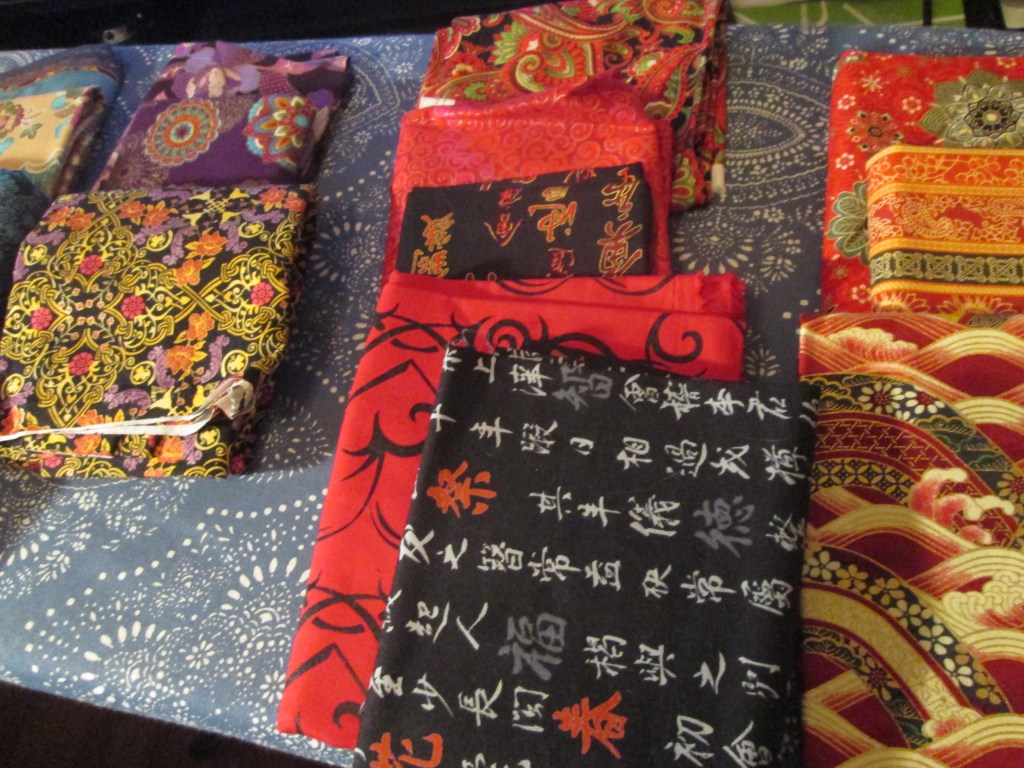
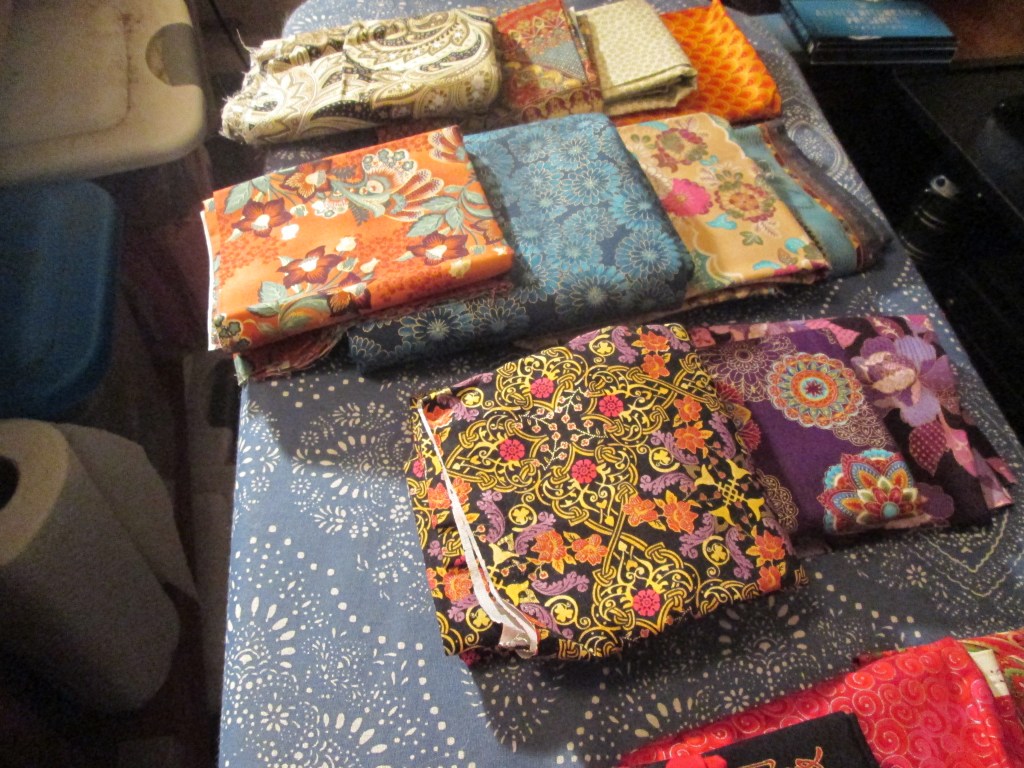
Hope you will join me on this journey! I’m still working on the patterns and will have the yardage needed on December 30. Here is a sampling of the fabrics.
NOTE: I am adding both November and December’s blocks into one post as I will be fairly busy over the next few months and I want to post them before they get lost on my desk.
I willbe adding patterns and pictures all week. Please keep checking back in. It takes a while to write, take pictures, test patterns, sew and post, and double check the patterns and I’m a little slow at times. Thank you!
OCTOBER BONUS BORDER BLOCKS: ITTY BITTY FLYING GEESE PINWHEELS
NOTE: I will be adding patterns and pictures all week. Please keep checking back in. It takes a while to write, take pictures, and double check the patterns and I’m a little slow at times. Thank you!
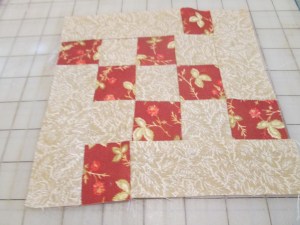
NOVEMBER ITTY BITTY BLOCK: FREINDSHIP STAR
This is a fairly easy block but remember those little flying geese units are very small to work with. Here is the link: This is a fairly easy block, but here is the pattern link:
NOTE: I will be adding patterns and pictures all week. Please keep checking back in. It takes a while to write, take pictures and post, and double check the patterns and I’m a little slow at times. Thank you!
OCTOBER BONUS BORDER BLOCKS: ITTY BITTY STARS
This is a really easy pattern and fun to make! You will need four (4) of these at 3.5 inches. You will need to scroll down to September for the pattern, click and print.
This is such a pretty block and easy to make! Instead of posting instructions, here is a link to Spruce Crafts. They have an abundance of patterns. Here is the link: https://www.thesprucecrafts.com/shoo-fly-quilt-pattern-three-sizes-2821113. Make sure to print out the pattern, and to scroll down to 6 inch. Have fun!
This is a classic pattern that goes well with other blocks as a companion. Just watch for the half square triangles that go around the block as they can be tricky to keep straight. Pattern and pictures will be up soon.
If you google this, you will find another version of King’s Crown, but this is a different variation. This version is similar to Birds In The Air pattern, but watch for the little squares that go in the center. Pattern and pictures will be up soon.
OCTOBER BLOCK #4: LITTLE RED SCHOOLHOUSE
This looks complicated and it is but only because it has so many pieces in it. But if you can keep your pieces marked and in order, it does go together quickly. Just be careful with the placements of the small squares. I am working on this and hope to post pictures this weekend.
Pattern and pictures will be up soon. This is a little different as it has the schoolhouse bell on top and is missing the other two roof pieces. I like the look of this one better.
NOTE: I will be adding patterns and pictures all week. Please keep checking back in. It takes a while to write, take pictures and post, and double check the patterns and I’m a little slow at times. Thank you!
There are 2 ways to make this block, one is using templates for rotary cutting or paper-piecing. I leave it up to you to choose which one works best for you.
I am attaching the instructions from EQ8, please click on the 6 pdf links below, they are ready to be printed. There are templates with this also, but I believe that most of us have the rulers available and you may or may not need all the templates.
Here is the link to Quilter’s Cache and that has paper-piecing. Make sure to click on both links to the templates. To me this seems a little easier than using EQ8’s instructions.
NOTE: I went ahead and used the pattern from EQ8. There are templates available above but it can also be pieced fairly easily, just sew it into rows. You want to make sure that when you sew the body together, to leave the seams open so as to insert the body. That involves a small inset seam at the top where the head is.
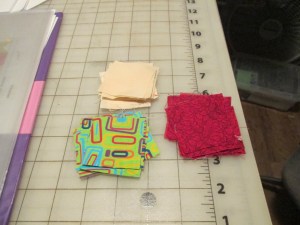
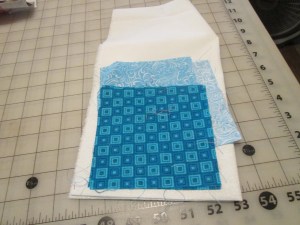
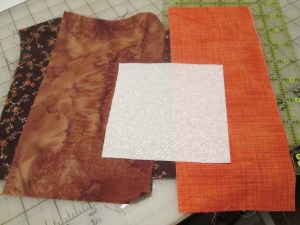
These are the colors that I chose:
You want to make sure that the long part of the template matches with template B on both sides.
Yes, that is the same piece of fabric, it looks darker above because of the lighting from the machine.
It’s easier to sew the small triangles on the top afterwards. But, when you do the bottom part of the body, do the triangles first. Do not sew the middle seams together yet, you want to make sure to leave this section open since the body goes in last.
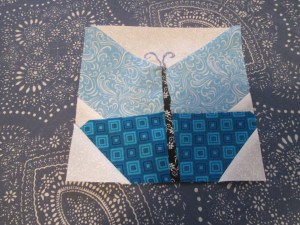
The finished block:
Don’t forget to add the antennae!
I can see a whole field full of butterflies! Enjoy!
I used the pattern from Patchwork Square and it went together very quickly. Note: Make sure that you have the 6-inch pattern in front of you. I had started making it and putting it together and then noticed that I was doing the 9-inch block. No problem though, I went ahead and cut down the HST units to 2 inches and it worked it great.
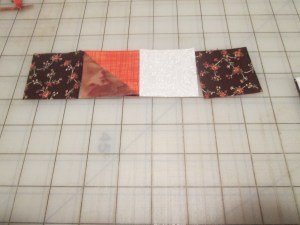
These are the colors that I chose:
You need to cut out from the dark and background, four 2-inch squares. Also, you will need to cut two 2 3/8 inches and cut once on the diagonal.
From the light and contrast pieces, you will need to cut 8 pieces at 2 3/8 inches and cut once on the diagonal.
Sew together your background and dark triangles and make 4 units.
Sew together your brown and other contrasting triangles together to make 8 HST.
Here is the block laid out. Sew together in rows.
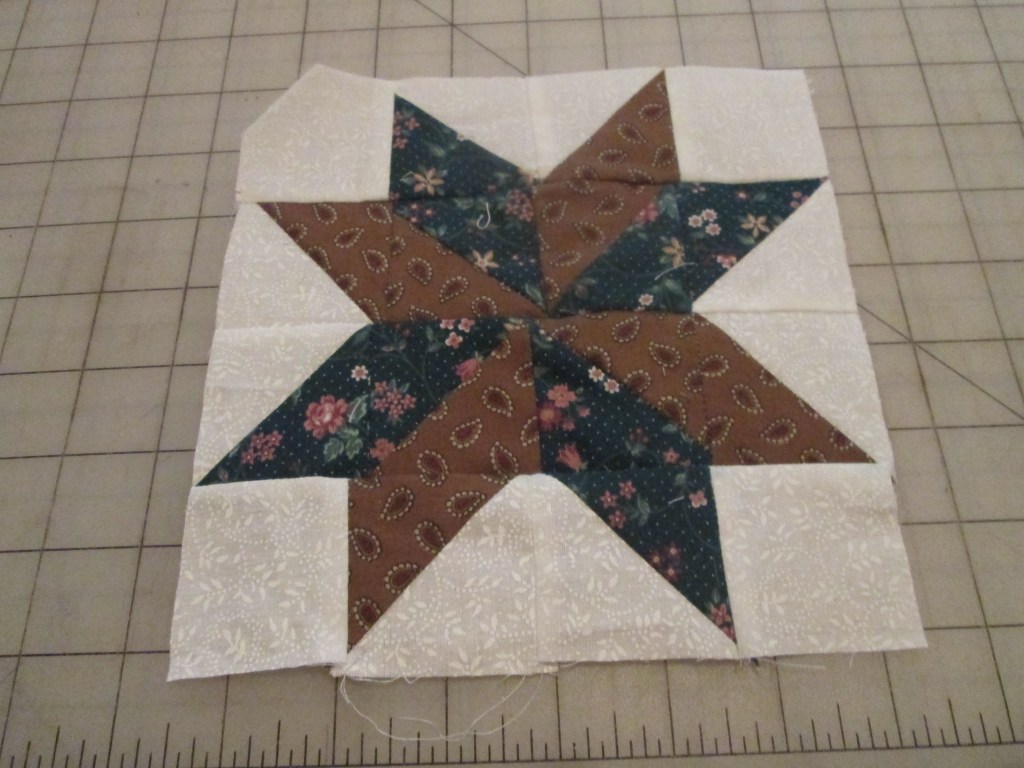
And here is my finished block. This is a sample block as it is a little off. They are fun to make!
This is a tutorial on youtube.com, Lemoyne Star without inset seams. This is from McCall’s Quilting and it takes the hassle out of the block and so much easier to make. It uses HST instead of the flying geese units and is easier to work with, at least in my opinion. I recommend it over the printed patterns out there.
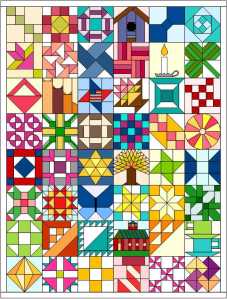
MINI BLOCK CLUB 2019
This is a complete list of blocks that are included in the Club’s Quilt. I know that we are behind on our blocks and the posting so I have gone ahead and marked them. All posted blocks can be found on either our FB page or on my blog https://cozyquilts.wordpress.com. Blocks that have an F after them are either still in progress or not published yet.
All blocks are from Electric Quilt 8 and were downloaded and printed. However, since EQ8 doesn’t show the directions on how to sew the blocks, I have either found a pattern or printed my own directions.
Ones that are optional and/or free blocks have a double asterisk **.
Border Blocks are in blue.🤣JANUARY BLOCKS:
Four Patch Variation 3
Susannah
London Roads
Ohio Star Variation
There are no Border Blocks for January.
FEBRUARY BLOCKS:
Bow Tie
Monkey Wrench
Odds and Ends ** (optional block)
Entwined Star
Border:Bow Tie
MARCH BLOCKS:
Twin Sisters
Rail Fence
Candle and Holder
Striped Shamrock
Border: Itty Bitty Bear Paw
APRIL BLOCKS:
Basket
Three Kittens
Flag Star 1
Grape Basket F
Border: Itty Bitty Log Cabin
MAY BLOCKS:
Box-in-a-Box Variation
Two Strips and 3 Triangles
Flying Squares F
Zenith F
Border: Itty Bitty Boat
JUNE BLOCKS:
Churn Dash
Double Irish Chain
Rocky Road F
Roulette Wheel F
Border: Itty Bitty Trees
JULY BLOCKS:
New Album
Hand Weave F
6-Point Star
Forbidden Fruit Tree **
Border: Pinwheels
AUGUST BLOCKS F
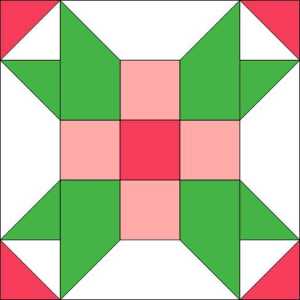
Friendship Star
Spool
Fool’s Square
Contrary Wife
Border: Reversed Flying Geese
SEPTEMBER BLOCKS: F
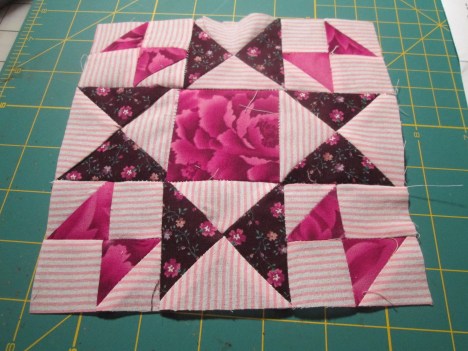
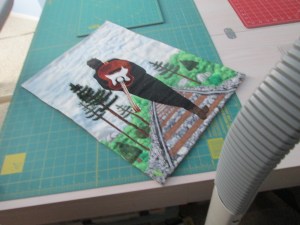
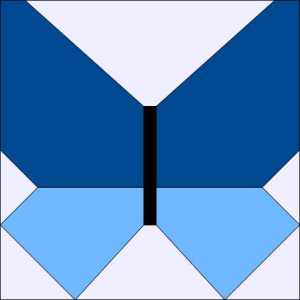
Butterfly
Clay’s Choice
Lemonye Star
Silver Maple
Border: Itty Bitty Hearts
OCTOBER BLOCKS: F
Shoo Fly
King’s Crown
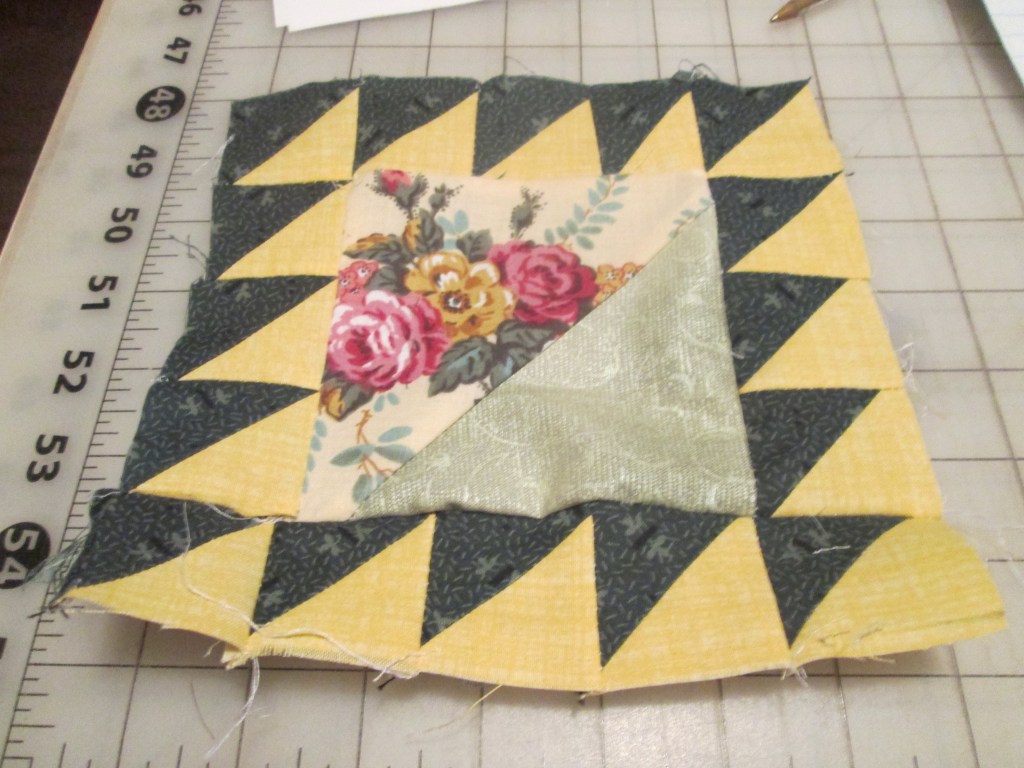
Lady of the Lake
Little Red Schoolhouse
Border: Itty Bitty Stars
NOVEMBER BLOCKS: F
Birds in the Air
Stacked Cups
Chinese Lantern
Cross and Crown
Border: Itty Bitty Friendship Stars
DECEMBER BLOCKS: F
Nine Patch
Christmas Stocking
Pinwheels
Card Trick
There are no border blocks for December.
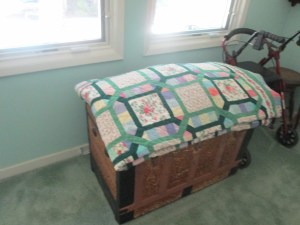
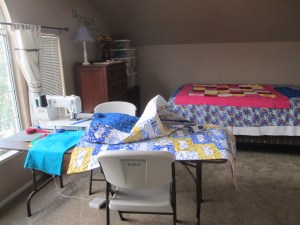
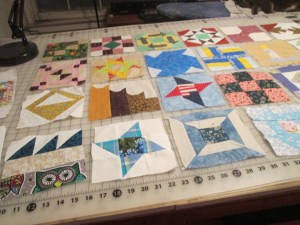
Here is a picture of the blocks that are made so far laid out on my table. Following that are the border blocks. I think it looks good so far and I hope that this will inspire us to finish!
The last picture is what it originally was going to look like. Hard to believe that we are almost halfway there!
Great job everyone! Please keep posting pictures!
NOTE: I will be adding patterns and pictures all day. Please keep checking back in. It takes a while to write, take pictures and post and I’m a little slow at times. Thank you!
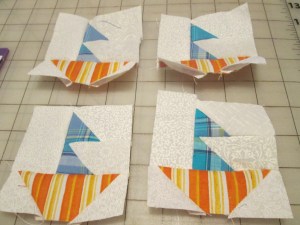
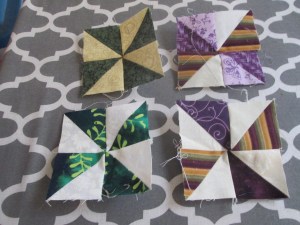
JULY BORDER BLOCKS, PINWHEEL 3.5 INCHES
I was gifted a bag of 2 inch HST a while back and last night I was playing with them and this is what I came up with. So fun, simple and fast to make, and very addictive. I sewed four HST together to make a fun little pinwheel. All you need are a bunch of HST and sew them together! Or you can go to the link and use their pattern. I really encourage using up what is on hand first but that is up to you.
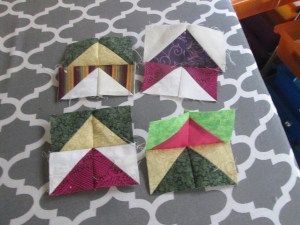
AUGUST BORDER BLOCKS, REVERSED FLYING GEESE, 3.5 INCHES
Again, using my magic bag of HST, I played with this idea, reversed flying geese. That means that the background becomes the center on one of them. Be scrappy and have fun playing with different color combinations!
These are just simple 2 inch HST sewn together, then adding a second one to the bottom of the first. Just think how scrappy and pretty this would be as an outside border. Sorry, no pattern this time, but very simple.
NOTE: I have finally learned how to export pictures from EQ8! These are pictures of the blocks only. I am still in the process of writing up the directions as it takes a while to make sure that they are accurate. Hope to have most of it done by tonight or tomorrow morning.
The blocks for August will be in this same section, so please keep scrolling down. I will update as we go along. Thank you!
JULY BLOCKS:
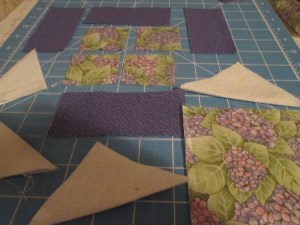
BLOCK #1: NEW ALBUM
This is simply a square-in-a-square pattern, very quick to make, fun and addictive. The block should measure 6.5 inches square.
FABRIC CHOICES AND CUTTING INSTRUCTIONS:
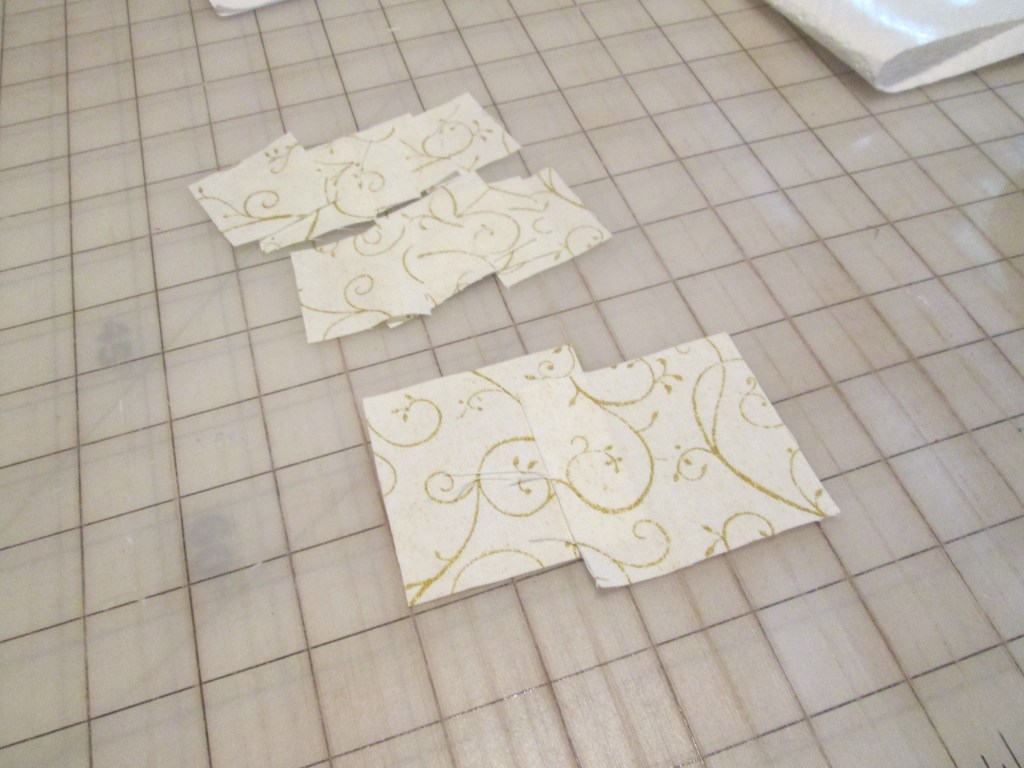
These are the colors that I chose. That is purple but somehow it shows up as blue.
From the dark purple, cut four (4) 4.5 inch x 1.5 inch strips. (Those are 2 inch in the picture, but I had to cut them down as otherwise the block was too big. I didn’t get a picture of the revised strips.)
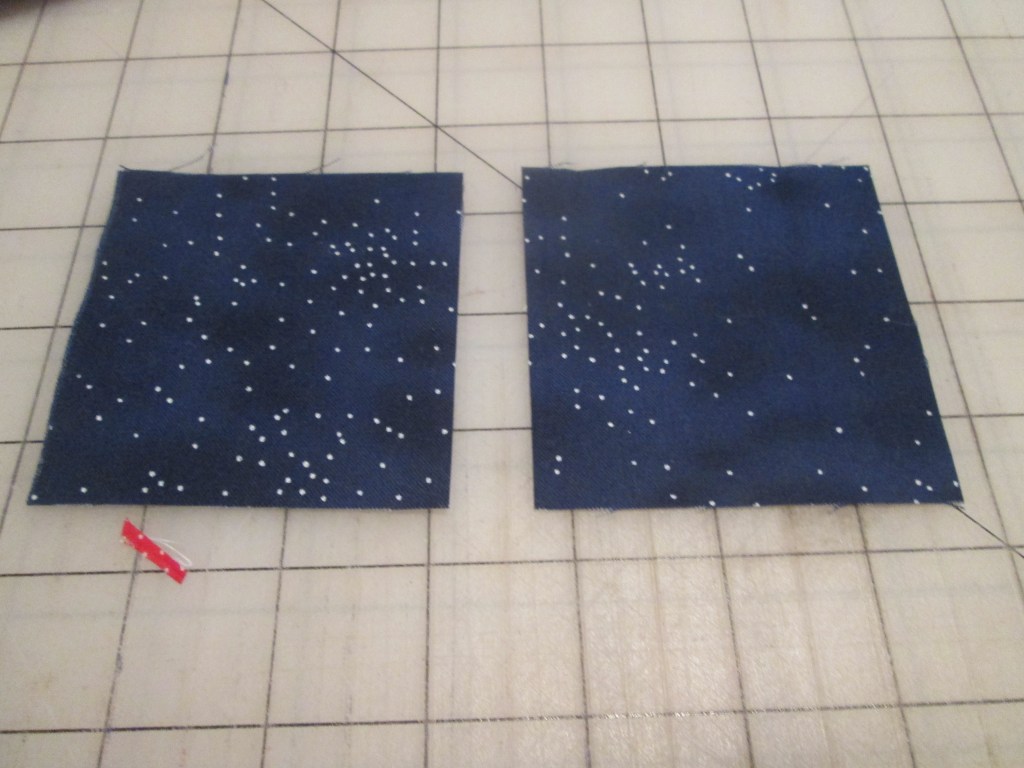
From the floral, cut a 4.5 inch square, and four 1.5 inch squares.
From the white or background, cut four 3.5 inch squares. Then press and fold on the diagonal.
SEWING INSTRUCTIONS:
This is fairly simple. I started with the center square and then placed the folded triangles, right sides together, and sewed them down.
Next, work on the outside units. I sewed one 4.5 inch strip to the top and bottom. I then sewed the 2.5 inch units onto either side of the remaining strips and then sewed onto the sides of the block.
NOTE: If you feel uncomfortable or not ready to try this block, you can choose your own block, but please try and make it similar to this level of difficulty.
This is such an easy block and yet I managed to make it the wrong size the first time. It came out at 5.5 inches square. That will teach me to sew when I’m half asleep.
Anyway, here is my finished block:
I forgot to take pictures of it as I was so happy to have it done.
Please make sure to scroll down about halfway, click the pattern itself and that will open it for you. It is the last one, 6 inches. You can either print the whole pattern or just the size you need.
When making the block, the important thing to remember is the placement of the triangles going down on the bottom and up at the top. Otherwise, it might not look quite right.
To Make One 6″ x 6″ Quilt Block
Spools: Cut from Four Different Dark Fabric
(1) 1-1/2″ x 3-1/2″ strip of each color
(4) 1-1/2″ x 1-1/2″ squares of each color
Background: (8) 1-1/2″ x 3-1/2″ light strips total
And here is my block. I decided to do a different color in the center. Have fun creating!
This looks more complicated than it is especially with all the HST in this pretty block. Since EQ8 doesn’t provide the instructions for putting the block together, I am providing a link to Patchwork Square. They have a complete list of what you need, how to cut and put it together, which is easier for all of us, rather than my trying to translate it for you.
Remember to scroll down halfway and there is the pattern. You will want to select the 6 inch pattern. I will be posting pictures of mine later. Have fun creating!
Following the directions from the pattern link above makes this complicated block a lot easier. It’s mostly made up of HST and squares, just watch the placement of the triangles.
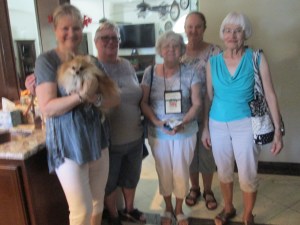
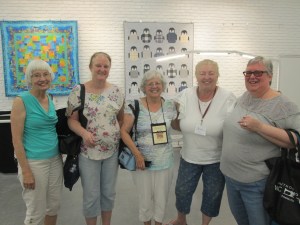
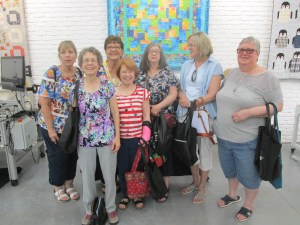
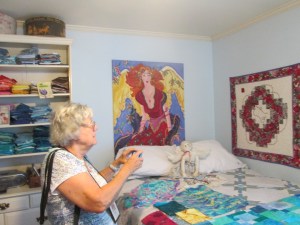
Gerry, Carol, Nancy and I all met at Joann’s parking lot in Clovis, and I had the wonderful privilege of driving these amazing ladies around Clovis and Fresno. We had a great time and thoroughly enjoyed ourselves.
Here are some pictures of the places that we visited yesterday. In total, 5 houses and 2 shops.
I want to thank everyone for opening up their homes and allowing us to visit their favorite places to create. Everyone was so gracious and it was a privilege to visit!
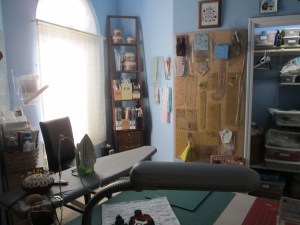
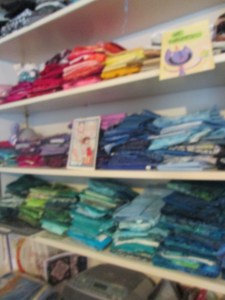
Terry has a spacious room with several work stations and it is well laid out with plenty of room for her supplies! And I fell in love with her refinished barn doors for her closet and the stash behind it. It also doubles as a design wall!
Next on the tour was Janet Nuxoll.
Janet was the first place winner of “Let’s Go to the Hop Challenge” last week. See if you can get it. It’s Johnny Cash’s “I Walk the Line”. One of my favorite songs as I was growing up!
A little smaller than Terry’s but well laid out, comfy and encourages creativity! Natural sunlight and a spacious closet for storage and a lot of wall space for display and designing! And well-organized!
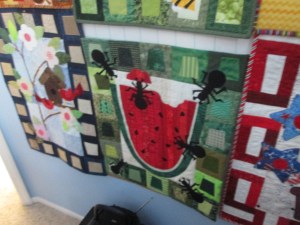
Feels like you can reach out and have a piece of watermelon!
Next was our local Vac and Sew in Fresno. It seams that we ran into a lot of friends who had the same idea! They had refreshments ready for us and a nice bag full of goodies to take home!
It was around noon and time for lunch, so we went to The Habit for burgers. Yummy! Afterwards we then drove over to Cyndy Smith for a tour of her studio.
Cyndy’s studio is smaller but she has plenty of room to work, and believe me, her work is beautiful!
Forgive me for not having more pictures of Cyndy’s studio, it malfunctioned a little.
This quilt looks 3-D but it is flat. It draws you in with the squares and makes it look as though it is pillowing out. I love the precision of it.
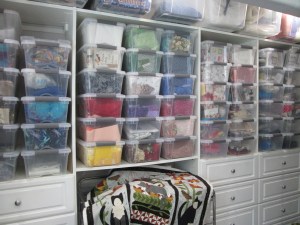
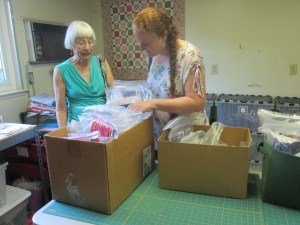
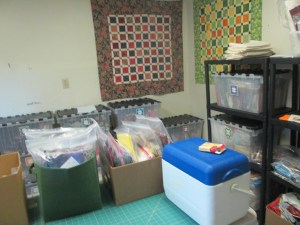
Our next stop was the home of the Guild’s Stash that is kept at Susan Schara’s garage. Very roomy and packed full of bins that are labeled by color, themes, etc. She also has kits in various stages that are ready to be sewn, quilted or bound. Susan is so generous to host the stash and we appreciate all that she and her volunteers do for the guild. A big round of applause to this energetic and sweet woman. She also does long arm quilting from her home. I do not have pictures of her set up or of Susan.
Carol did manage to come home, with Diana’s help, with a few kits that she will work on this month and then turn them in to the guild to be quilted.
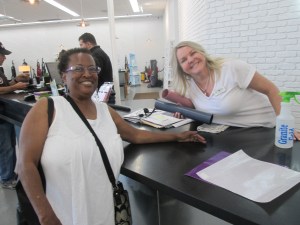
We are now leaving Fresno and heading back to Clovis for the final two stops. At our last stop, we will turn in our passports and maybe one of us will win the door prize. Next stop, D&J’s Fabric Shop.
This is one of the owners of D&J’s but I did not catch her name. It is a lovely shop that sells Babylock and Bernina machines of all types, plus fabric. They also have a room set up for classes that you can enroll throughout the year.
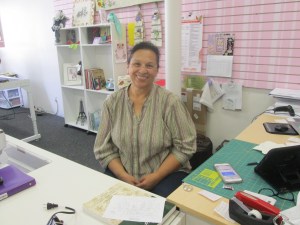
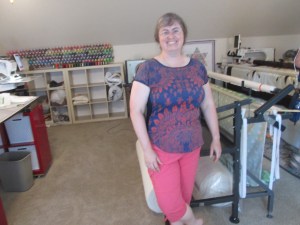
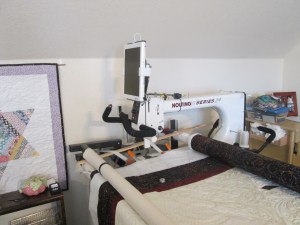
FINAL STOP! Michelle Carlson!
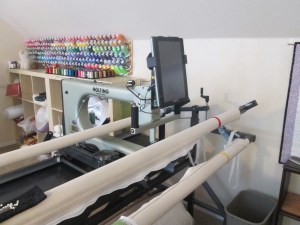
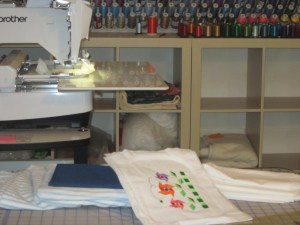
Michelle’s studio is upstairs and is HUGE! She even had to take over the room next door to put in another long-arm machine. I believe they are all Noltings and are computerized. She has her business here and does excellent work. She says that she has very little time to sew for herself as she is busy year round. Oh, she also has a Brother embroidery machine, and it is heavy duty and large. Sorry, did not get a very good picture of it.
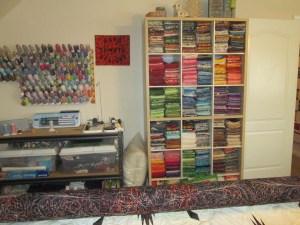
I love her collection of different threads, a gorgeous rainbow of colors.
And so we say goodbye to the Studio Tour! We all had a wonderful time oohing and ahing over all that we saw.
You may have noticed that the picture is not up at the top. That is because I have been going through some of the blocks and have determined that a few may not look just right because of their original size, number of pieces, and style and may not translate well into this quilt. I am auditioning other blocks to see if they might work out a little better and that is part of the reason that the blocks are a little late this month. Blocks are subject to change and I reserve this right. I will be replacing the picture later this month.
Thank you for your patience.
Hello and Welcome Back!
Yes, it has been a while since I posted but it has been a fairly busy month! But I am back with the 3 inch block for June!
It is a brand new month and what better way to start than with some fun little mini blocks! Remember the summer time when you would go outside, take a good book and read under a shady tree? I loved doing that on long hot summer days!
June’s border block is Itty Bitty Trees. Now this pattern is paper pieced but very easy and I believe that you can probably piece it if you want. But we are here to stretch our abilities and it is very simple to make. Here is the link to the pattern and the templates:
Or you can probably just piece them the old fashioned way if you wish.
You will need to make 4 of these and they are for the borders. I will be making mine today and also will have pictures and directions ready later today. I am also still catching up on my other blocks.
Chat soon!’
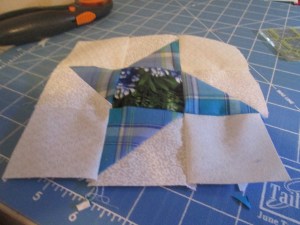
I went ahead and pieced mine as my printer was not working and I was unable to print the templates. They are fun to make and addictive!
PS: And don’t forget to post pictures! I haven’t seen many lately and I would love to see how everyone is doing and if you have any questions or comments!
June 10, 2019: Hello Everyone
I am still testing the patterns for June and hope to post them tomorrow morning. It’s 103 here in hot, humid, sunny Fresno and my windows face west and it’s very hot in there, so I hope to do some sewing this evening if and when it cools down. I hope that everyone is staying cool!
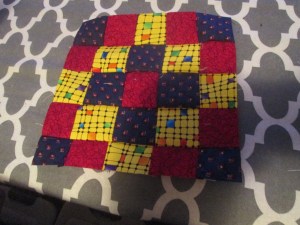
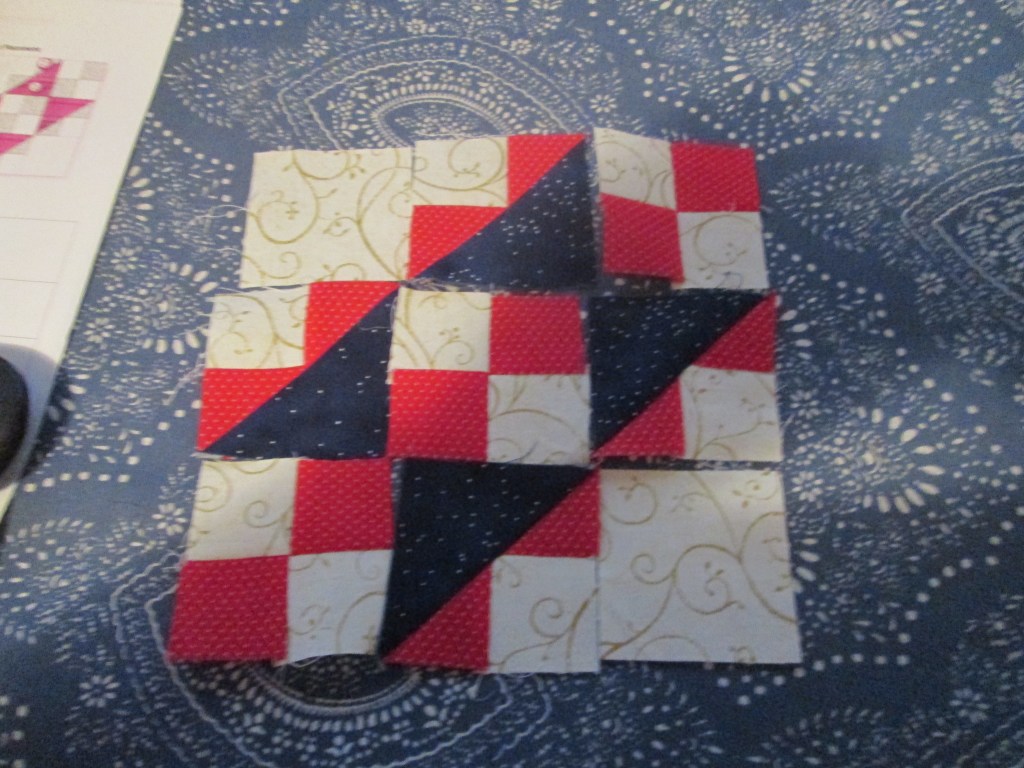
BLOCK #1 DOUBLE IRISH CHAIN
This is a fairly easy block to make. Choose 3 colors or small prints, dark, medium and lighter for a good contrast.
From each of the colors, cut eight 2 inch squares. except for the medium you will need 9.
There are 5 rows in this block and there are 5 blocks across.
For the first and fifth row, the pattern is Dark, Medium, Light, Medium, Dark.
For the second and third row, the pattern is Medium, Light, Dark, Light, Medium.
For the third row, the pattern is Light, Dark, Medium, Dark, Medium.
This will give the block a checkerboard-like appearance, only using 3 colors instead of 2.
I went with light, medium and dark for my block. I know that I messed up on the center of the block but this is just a sample and I do plan on redoing it. Some days I sew better than others. 😀
From the background, cut 2 squares 2.5 inches, and 10 squares at 1.5 inches.
From the contrasting color, cut 6 squares at 1.5 inches. Then cut 4 squares at 1 7/8 inches, and bisect on the diagonal once.
From the dark, cut 2 squares at 2 7/8 and bisect on the diagonal once.
From the 2.5 inches squares of the contrasting and the background, make three 4 patches. See above picture.
The make 4 flying geese units with the remaining background and contrasting color.
The blue triangles will go at the bottom. Now that it is pressed, you can put the block together. Make sure that your pieces are all 3.5 inches. Be careful of the triangle placements.
Here is my finished block. I love how the red and blue play so nicely together.
BLOCK #4: ROULETTE WHEEL:
NOTE: This was supposed to be One Wheel with 12 Spokes but it is paper-pieced and I am not comfortable enough to tackle this block, and I did promise no PP. So, I am substituting Roulette Wheel instead that uses up a lot of small triangles. Hope to have it posted later today.
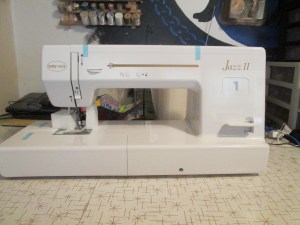
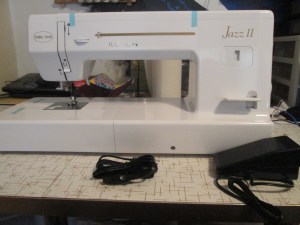
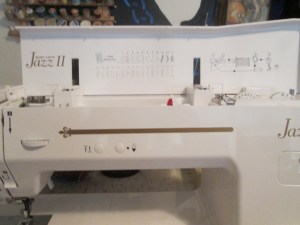
TA DA! Introducing my newest sewing machine! It’s a Babylock Jazz II! I LOVE IT!
Her name is Suzy Q! It is not computerized and I have to use a foot pedal but that’s okay. It has a deep throat of 12.5 inches so it is ideal for quilting larger quilts which is what I’ve been looking for a long time. My Brother only has a throat space of 4 inches and that is just way too small a space for quilting and takes a lot of time wrangling the quilt under it. I had my first lesson at Kiki’s today! Thank you Doug! Best part is that she was on sale for under $1000, comes with a long warranty and free classes! She is very heavy so I won’t be taking her to classes and I think, unless Doug helps me move it, that this is her permanent home!
She sews like a dream! I’m so very happy and excited!
You may have noticed that the picture is not up at the top. That is because I have been going through some of the blocks and have determined that a few may not look just right because of their original size and may not translate well into this quilt. I am auditioning other blocks to see if they might work out a little better and that is part of the reason that the blocks are a little late this month. Blocks are subject to change and I reserve this right.
Thank you for your patience.
I haven’t been on much lately but I’m BACK! I seemed to have lost my sewing mojo last month and am getting caught up.
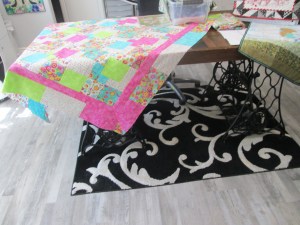
Can you believe that we are already into May and that we are almost halfway through our quilt! Since we have 16 blocks made it is time to start thinking about possibly sashing our blocks. Me, I’m thinking of black thin sashing. Since we are doing 4 at a time, maybe grouping the blocks together that way may be best. I will leave the color and size up to you.
Tomorrow, May 6, I will be posting the Bonus Border Blocks plus a couple of blocks just a little bit early.
Chat more later!
BORDER BLOCK BONUS!
Bitty Boat 3.5 inches
Please make sure that you go to July, Bitty Boats. It is very easy to make. I am still finishing mine and will be posting them tonight.
Just to let you know I have been playing around with the layout for May’s blocks and am still deciding between 2 different blocks as the first one. Sew easy to get distracted when looking at patterns! 😍😊
Have fun!
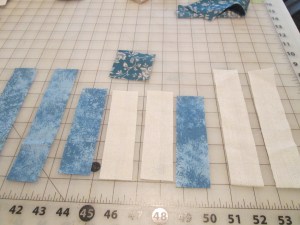
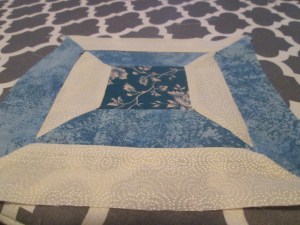
BLOCK #1: TWO STRIPS AND THREE TRIANGLES:
This is a very easy block to put together and a little addictive! I think it would make a great secondary block or a bridge.
For the block, you will need two strips that measure 6.5 x 2 inches. Sew those together. You will also need three 2.5 inch half square triangles (HST). Sew those together and then attach to the bottom of the block and you are finished! The block should finish at 6.5 inches all around.
This block looks easy and it is but it is also an exercise in set-in seams. Remember, when you do your set-in seams (not Y-seams) you want to go just to the edge of the seam, don’t cross over it. Very easy, but you might want to pin it to make sure you get it just right.
These are the colors that I chose.
CUTTING INSTRUCTIONS:
From the background, you will need to cut the following:
Two 1 1/2 inch x 7 1/4 inch strips.
Two 1 1/2 inch x 5 1/4 inch strips.
2. From the alternate color, you will need:
Two 1 1/2 inch x 7 1/4 inch strips.
Two 1 1/2 inch x 5 1/4 inch strips.
3. And for the focus fabric, one 2.5 inch square.
You will need to cut the four outer pieces at a 45 degree angle on each end. This will help with the set-in seams.
SEWING INSTRUCTIONS:
Starting with the center 2.5 inch square, attach the two dark alternate colors to each end. (I forgot to take a picture with just the ends.)
Next, add the first background at the top. When you finish attaching it, then carefully sew from the edge but make sure that you don’t cross over the stitch line. Otherwise, you will have a mess. Ask me how I know. 😀 Make sure to press in between so that it stay flat.
Then repeat for the remaining three pieces using the same technique.
And here is the finished block:
I will be posting the last two blocks tomorrow. My computer decided it needed to update and I wasn’t able to access it for most of this evening.
HAPPY MOTHER’S DAY! I hope everyone had a wonderful day!
Here is a tutorial for this whimsical take on a 9-patch. Please make sure to scroll down a ways for the pattern. The pattern states that it finishes at 5.5 inches, so in order to fit, you will need to adjust the size of the squares to 1 3/4 inches instead of 1 1/2 inches. Please keep that in mind while putting it together, otherwise it will be too small. Please note that this also involves set in seams.
This is an intermediate block but easy to assemble. It is made up of half square triangles and flying geese; even though you can use all HST even for those units. You can find the pattern here at Patchwork Square. Please note that is a 6.5 inch block when finished so make sure you print that section out. I will be posting mine sometime tomorrow.
I finished mine this morning but am not happy with the way it turned out. I am not fond of making flying geese units the way they showed it in the pattern, so I will remake it using a different method.
Thank you for playing along!
May 13, 2019: I seem to have injured my right shoulder and it’s very painful to move. I will try and post later this week. Thank you for understanding.


:max_bytes(150000):strip_icc():format(webp)/Arkansas-Traveler-Instructions-5818f8b95f9b581c0b6c7cf5.jpg)